I’m guessing most of you have seen this, but I’m embarrassed to say I finally saw it just this past weekend for the first time, after hearing so much about it. So maybe some of you haven’t seen it either. Worth seeing again, anyhow. I can’t stop thinking about it — it is incredible. Not stop motion — but just beautiful animation.
Author Archives: stephanie dudley
We Have Hairdos, Yes.
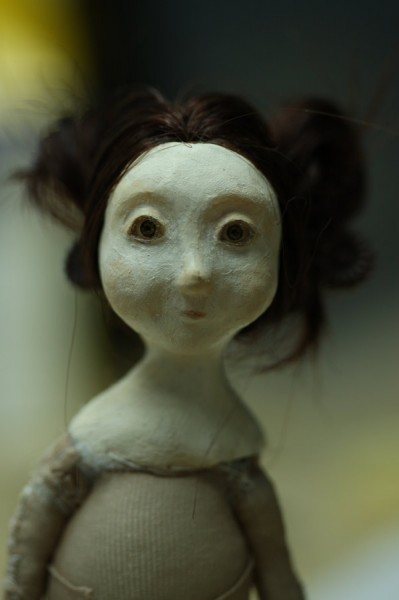
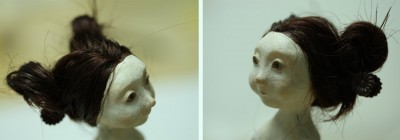
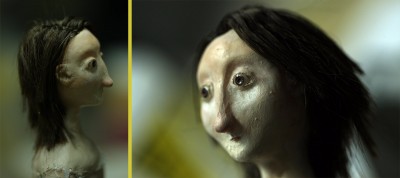
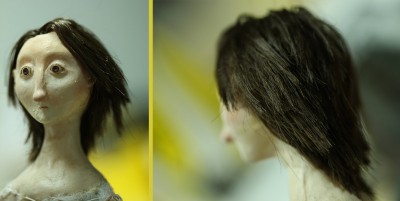
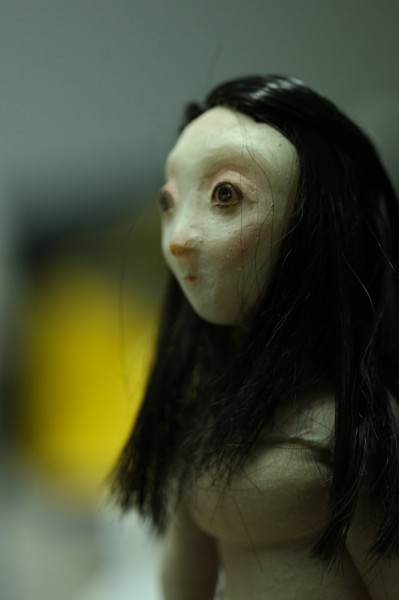
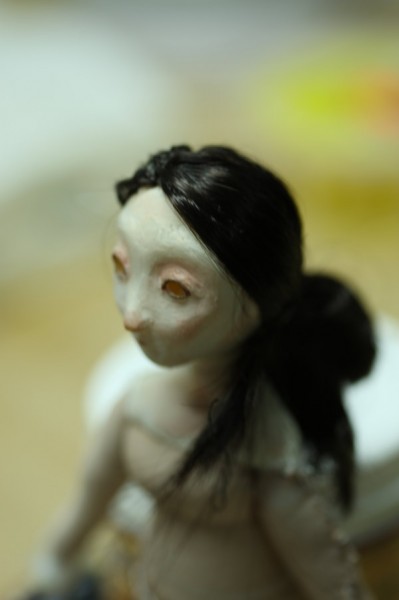
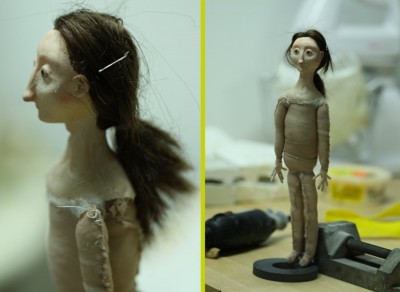
My friend Loretta came by last week to cut and style all the puppets’ hair. There are no hairdon’ts here. Nosir. I think they’re looking great.
First of all, this character absolutely slays me. Is she not insanely cute? She’s not the main character though — she’s her sister, Abigail:
Here’s the Dad, Xosé LuÃs. We’re not 100% sure yet about his long 70s shag haircut; this might be cut shorter and more traditional once he’s wearing his costume…
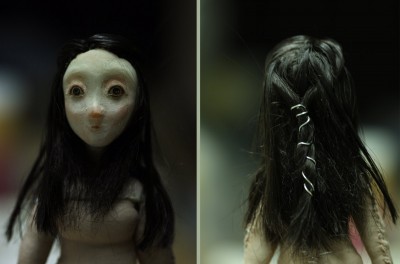
Loretta gave the Mom, Liberdade, just the right type of look, I think. Not 100% sure about the wire at the back; I might paint this to knock it back a bit. Have to wait and see, again, once she’s in costume:
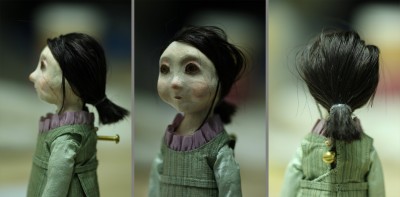
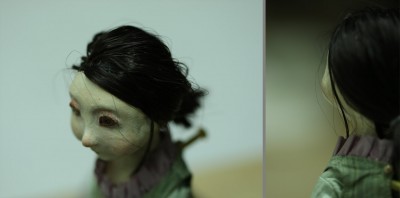
Finally, there’s Sabela, with her new ‘do. Similar to the old one… it’s meant to look like she did it herself. It’s a little-kid-ponytail.
And here’s Loretta’s fancy toolkit, and Loretta at work. She’s brushing boiling water on the puppet to try and hold the nylon hair in place. We later fixed the hair with some glue called “scenic cement” that’s intended for model railroad foliage. So the up-dos are not coming down — they’re rock solid.
Thanks Loretta — you are a genius!
How to Instal the Hair
Instal? Hair? Well, I don’t know how else to describe this process. I did this with both practicality and aesthetics in mind, as usual. So it’s about 1/10 rooted strands of hair, and 9/10 glued on. Rooted where you could see the roots, and glued everywhere else.
- I used these nylon hair extensions made by Easihair. Nylon works well because it’s heat-resistant, which means you can iron it and style it with boiling water. (Ouch, poor puppet!) Real human hair extensions would also work, but of course they’re much more expensive, and somewhat gross, in my opinion. So to work with these extensions, I had to take out the elastic that the hair is stitched to, splice the lengths of hair apart (they came sewed into 2 layers of hair, one shorter than the other), and iron each length of hair (on the lowest heat setting!) so that it’s straight and easier to work with.
- Next I painted a “cap” on the puppet’s head where the hair would go, to fill in the scalp with the colour of the hair. I mixed about 2/3 acrylic paint with 1/3 liquid latex so that it’ll be stretchy, and won’t peel away from the scalp.
- Here’s what the length of hair looks like once it’s peeled away from the elastic and its other half…
- I hold the length of hair up to the base of the scalp, and mark the length I’ll need for the base of the scalp. I stick the trimmed piece on with liquid latex, and work my way up the scalp, one layer at a time… letting the latex cure in between.
- Here’s the first layer of hair, stuck in at the base of the scalp.
- Then I add layers about 1 cm apart, wrapping in a horizontal semicircle around the head, to fill in the painted area. There are about 3-4 semicircular layers on this puppet.
- Once I get to the top, above where the part would go, I divide the head into 2 halves, adding smaller strips of hair on either side of the part. I.e. now the strips aren’t semicircles around the head, but rather 2 lines parallel to the part. I build these layer by layer until the 2 strips are about 5 mm apart, surrounding where I want the part to go. So for Liberdade, the part is on one side, so there’s one side that has more strips of hair glued in.
- Now comes the rooting part. First I made a hair rooting tool out of a medium sized needle. Using a Dremel tool, I file off the tip of the needle’s eye, making it open at one end, so that it forms a Y shape.
- I carefully cut apart the strips of hair into strands using an Exacto knife. Thankfully the way these hair extensions are made, the hair is already in perfectly sized strands, looped at the sewn end. I carefully insert the loop of hair onto the Y needle tool.
- Then I jab the hair into the head, strand by strand. This is pretty hard to do… both because it’s kind of gruesome repeatedly jabbing hair into a human-like head… but it’s also a delicate task. I carefully hold the needle in place, with the eye side pointing towards the head, holding the strand of hair, and use pliers to force it into the scalp. It takes quite a bit of force, which is why I learned to use plumber’s epoxy to reinforce the puppets’ head armatures. Otherwise the head will lose its shape here.
- The rooted hair will stick straight up. As mentioned above, the best way to make nylon hair take on a specific shape is to use heat — in this case, I just pour boiling water over the head (!) and smooth it down into place. At the end, I do some paint touch-ups, making sure any latex-glue areas are painted over with the hair colour, to mask any strange gobs.
Here she is, with newly rooted and glued hair. Later she gets a haircut and a special stylin’ ‘do!
Liberdade
Text and Sound, Silence and Understanding
Mike Brent wrote a post a couple days ago about how difficult it is to tune out human voices, and the effects this has within the context of a film.  I’d never thought of this before, thinking of film as a medium that fills in the visuals for you where other mediums don’t. But film dialogue and — especially — voiceovers can sometimes give too much away, filling in the silences that draw the viewer in, allowing them to be co-creators of the film.
This got me thinking about my own film. Translating between different languages of voiceover, text, and image is central to what I’m attempting to work with. I wrote before about how the poem on which the film is based is written in Galician, and how the poem’s author uses language as different dimensions of mind… each language concerting its own thought patterns, and each non-English language providing escape to the drone of the Big Voices (commercial media, political speeches).
What happens when the voice in a film is speaking another language? If there is silence, or another language, or if the voice is too quiet, then the viewer’s mind tends to either ignore it completely, or it becomes occupied in trying to understand. The mysterious sound of a foreign tongue becomes a puzzle for the mind to focus on, trying to interpret or make sense of what it hears, like trying to find an image inside an ink blot. We can’t just let things be.
I used to practice something which may seem kind of odd… I don’t have the advantage anymore of being able to enter the dimensions of other languages (I used to speak fluent French, but have almost completely lost it.) So my breathing space away from the Big Voices of English involved pretending I was a fish. (!). Walking down a city street, which is flush with signs and posters, sandwich boards and stickers, I would pretend that I was a fish, crawling along the bottom of the ocean. All living beings were other fish and fauna, swimming along; all sandwich boards, signs, and posters were simply flora and rocks of the ocean. They became shapes and colours, with no meaning beyond these visual properties. Suddenly text becomes unreadable; text is no longer text. It’s just a bunch of colourful symbols, no different from any other image on a flat plane.
This way of seeing takes practice. But I found it incredibly soothing. I stopped trying to understand or problem-solve the images of my own language. There is a difference in my mood when I’m walking along a busy downtown street, bombarded by visual imagery and text all vying for my attention, vs. walking along a busy downtown street and not absorbing any information. Of course, I am aware of my surroundings, and not about to walk into traffic or anything… but it takes a different kind of awareness to disorganize visual language and see it from the perspective of an illiterate being — illiterate in the sense of not being able to read text OR flat visual imagery.
Often on public transit I hear people speaking languages I don’t understand. Lots of them. In this case, I enjoy listening but trying not to create stories in my head of their dialogue. I allow myself to be content not understanding, but just enjoying the sounds of language, of people’s voices.
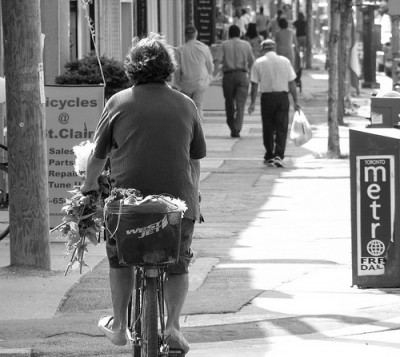
This breathing space becomes essential to me. Even when it seems impossible to do suddenly unlearn a language, like when walking down a busy(ish) street such as this:
I’d like to turn down the loudness and simply walk down the street, a quiet and neutral observer.
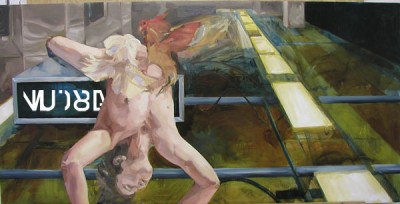
I did an oil painting a while ago that was partially about this practice of non-understanding, or seeing only solid values of shades and tones, concrete things, without joining them with meaning; or wanting silence. I went to a subway station in the city that was under construction, and took some pictures of the open ceiling. (A subway cop actually approached & casually questioned me while doing this… I think it was 2002 or so, so too close to 9/11.)
I then flipped the scene and disguised the text into something unreadable…
Make what you will of a figure fallen on an unreadable sign, with the world upsidedown…Â Not my happiest image…
But back to the film. There will be moments in there where I’ve planned to let the v/o run on its own, without the crutch of the written text to translate, for a brief period. Just to have that space (for non-Galician-speakers) where the mind tries to understand, but isn’t able to. And perhaps the viewer gives up, just seeing the image and the sounds of a voice, but not taking in meaning, for a moment. Or rather, perhaps, she provides her own meaning to the voice, for that moment.
Xosé LuÃs
Finally! I’d like to introduce Sabela’s Dad, Xosé LuÃs.
OK, I’m still getting the hang of this sculpting with nylon stockings. It’s not as easy as it looks!
I’m just thankful that the little dude will be wearing very heavy clothes to cover up the seams and oddities. I’m honestly not too sure why I seamed his legs up the front, when he’ll be sitting in a chair…?
I’m very pleased with how his face turned out though; note that he will look a lot less like Geddy Lee once his hair gets cut to a short new ‘do.
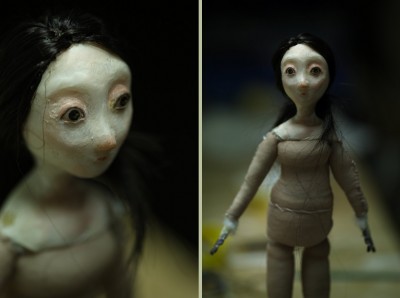
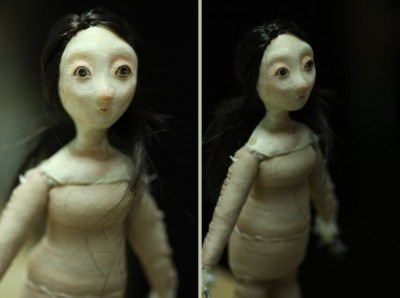
And… I’m still sewing her, but here is the Mom, Liberdade, in progress.
I sure hope I haven’t broken any rules of puppetmaking by taking photos of her BEFORE she has eyes! I realized after that I might be going against the flow here. But I just couldn’t wait.
Meet Abigail
And, here she is with her big sister, Sabela:
Abigail is going to be sitting at a dining room table for the whole film, thus the bolt in her bum. She’ll be wearing a jumpsuit and rollerskates. She will be getting her hair cut and styled eventually; it’s not supposed to be quite this crazy (though I like how it looks like they’re little troublemakers, with their messy hair!)
Here’s where she was getting painted:
I’ve just cast the mom and dad, and will be working on the dad, Xosé LuÃs, next. His head cast looks pretty awesome, if I do say so myself. Which is a relief, because the first cast failed.
More soon!
How to Cast the Legs
The process I used to cast the legs for Sabela is pretty much the same in theory as the one I used to make the head. Basically I created a latex skin, and filled it with soft Urethane Foam. You can read all about that final foam casting process for the head here.
Step one to making these legs, which is creating an armature with rare earth magnet feet, is here.
I made the legs a little differently than the head, though. First, I found the leg mold cavities too narrow to coat with latex while closed, as I had done with the head casting. So I brush the latex into both halves of the open mold instead.
- First I added a third strand of armature wire (1/16″) to the 2 that were there before, and twisted them together. Then I inserted a bit of that 22-gauge jewelry wire (pictured in the rare earth magnets post) into the heat-shrink tubes, and wrapped it around the 3 strands of armature wire. I’ve learned to add this jewelry wire to all my armatures as a backup for when the main wires break… so I’ll have a little more time with the puppet before I need to replace it. After the armature’s done, I set it in place inside the mold, and mark off where the heel ends, either side of the knee, and the top of the thigh. These markings give me an idea where to leave the armature wire free and bendable in the next stage.
- Once I have the knee, ankle, and hip joint marked off, I fill in these spaces (basically the tibia and fibula / femur bone areas) with plumber’s epoxy, providing solidity to where I don’t want the leg to bend, but leaving the joints open.
- I remove the armature from the mold, and brush 5 thick coats of liquid latex into the leg cavities. Each coat needs to dry fully before applying the next. I try to be careful in the feet, not to build the latex skin up too thickly, or else the armature won’t fit into those areas.
- Finally, I place the armatures back into the mold. I brush a very liberal amount of latex on the edge of the molds, onto both halves… making sure to cover both inside the edge AND outside the edge. This will create a pretty heavy seam on the legs when they’re demolded, but that’s OK — the seams will be removed. The heavy edge coats just ensure that the halves of the skin will meld together.
Then I bundle it all up with the elastics and that nice yellow strap, and let the whole thing sit for a few days. There’s not much airflow going into the mold, so this one takes longer to cure than the head does… 3 or 4 days is usually pretty safe. Then I do the urethane foam casting as described here.
C’est tout!
Process… the Parts.
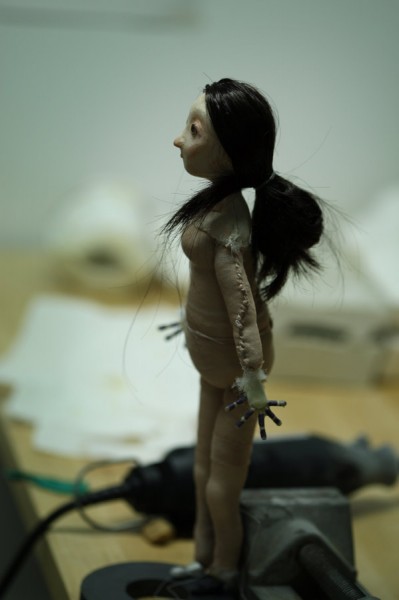
Here’s what I’ve been working on the past couple of days, and where things are going. I’m back into crazy detail mode!
I’ve made a set of hands for each character. After wiring them up and filling the palms with Milliput, I dip them in some slightly-watered-down liquid latex. Like tiny candles, I hang them up to dry vertically, so the fingers form the right shapes.
I found this awesome electrical wire (right) at Active Surplus. 10 cents a foot! So I bought 6 feet. This 60 cent length of wire will make about twelve thousand tiny hands. Woohoo!
I also plan all my hands to the finest detail (left)… measuring out each tiny length of wire insulation… not so much because I’m particularly obsessive when it comes to these types of details, but so that I can remember how I did them when I make duplicates. Huzzah!
And, last but not least, I’m planning the colour palette for the dining room set. Most of the set has already been constructed, but it’s all sitting nakedly in its pale balsa wood form right now. Soon I will paint everything in these bedazzling colours… Kapow!
Note how I’ve cleverly changed the numbers in the “Total Parts Needed” column to make myself feel like I’m more ahead. I can build the backups once I know everything’s working perfectly — in other words, once I start animating.
In my estimation, the first 4 puppets will be finished sometime next week — painted, assembled, finito. Then I can hand them all over to my friend Alli, so she can finalize the costumes.
Then: dining room, wiring up the practical lights, final set touch-ups, animatic tweaks, test animation, meetings with Marcus about the lighting, setting up rigs, renting fantastical lights, and we’re ready to shoot. Whoopee!
Working with the Seasons
This past weekend, my mom and her partner, John, came by to insulate the garage / studio where I’m doing all this work on the film. The studio walls are insulated, but the garage door wasn’t — it had huge gaps all around its edges, and the door itself is very thin. I noticed during the summer that, at a certain time of day when the sun hits it, the door acts as a heater. It’s painted black on the outside, and since it’s so poorly insulated, the heat just pours right through it.
Soon, it’ll be winter. I’m a little excited to think of how well the type of work I’m doing is fitting in with the change of seasons, and how it will feel to be in a dark room animating while it’s cold and snowy outside. Spring and summer were for building and creating things, coming up with ideas and designs, and growing the film.  Now it’s fall, the air is getting chilly, and it seems like time to withdraw into a (hopefully) warm cocoon.
First, the 2x4s and fibreglass go up… The last of the door windows is closed in… and then the whole thing is covered by plastic, tape, and finally a heavy purple curtain. What’s behind the curtain — no wizard, just these pink guts of glass…
I put up the newly framed James Jean poster in the corner of the studio, for inspiration. The image even has cabbages in it! I saw him give a talk with Paul Pope at a Beguiling-sponsored comic event last year. (Beguiling is a popular local comic store… here is the poster, close up.) Love his work.
Yesterday was the first day in the studio since the garage wall has been insulated… what a difference! Not that it’s that cold yet, but the soundproofing provided by that 6″ thick, R20 candy floss is pretty amazing. The space is totally cocoon-like now. Ready for winter… almost ready for shooting, too.

